CONTENT
We've recognized the need for a dedicated page to help handle jobs en masse (in terms of organizing them) with a proper format to better aid visibility in one place, without needing to open each job individually or jump through hoops.
Where To Find It

To access the Job Explorer, open the App Tray in the toolbar at the top of the webpage and click on "Project Management."

Here on the Project Management page, to the left, you'll see a section for the "Job Explorer." Click on that section to open up the Job Explorer view, consisting of two panels: the Folder Viewer and the Action Panel.
Folder Viewer

The Folder Viewer displays the folder structure of all the jobs you have access to.

This icon (pictured above) that looks akin to a building represents the company that owns all the jobs in the consequent folder structure. So if other companies share access to their job with you, that job will show up in the folder structure underneath that company's name that appears next to this icon. If jobs weren't shared with you and you only have access to your own jobs, you will see one of these icons with your company name next to it. You can only edit your company's folder structure, you cannot edit the folder structure of other companies that may appear in your Job Explorer view.

Underneath those company icons, you may see this icon (pictured above) that looks like a folder with a name next to it. This represents, yes, a folder. This will hold other folders or groups of jobs.

If you open a folder to view its contents, the icon will show an opened folder (pictured above).

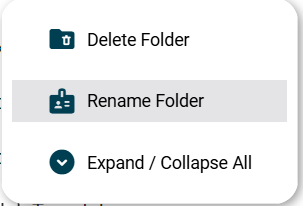
If you right-click on a folder, this menu (pictured above) will pop up. You will have an option to delete the folder, rename it, or expand/collapse all its contents. Exercise caution when deleting a folder, as its contents will also be deleted. Empty the folder before deleting it if you want to keep any other folders/jobs inside the folder you're deleting.

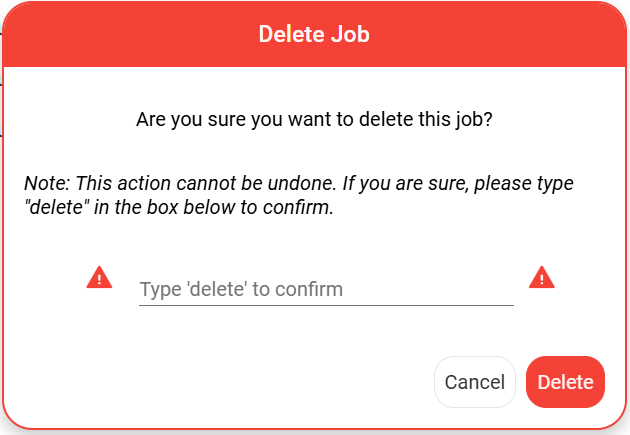
When deleting a folder, you will be prompted with this dialog window, asking you to type 'delete' to confirm the deletion of the folder and its contents.

Should you choose to rename a folder, this dialog window will show up, displaying the folder's current name and ask you to provide a new name for the folder before clicking 'Rename' to commit the change.
As for the Expand / Collapse All option, if the folder (or company level) has any or all of its contents displayed (i.e. some folders open), it will collapse everything. Otherwise, if the folder (or company level) has all its contents closed, it will expand and show all its contents.

Jobs will have these location pin icons (pictured above) next to them.

Right-click on a job to open a menu with options on what to do with it. You can open the job, clear any highlights, delete the job, or rename the job.
When you choose to open the job, a new tab will spawn and open that job in the Maps page. The "Clear Highlights" option will clear any of the visualizations you have applied to the Folder Viewer, which we will cover later when we explore the Action Panel. The same dialog window that appears when you delete a folder will also appear when you delete an individual job.

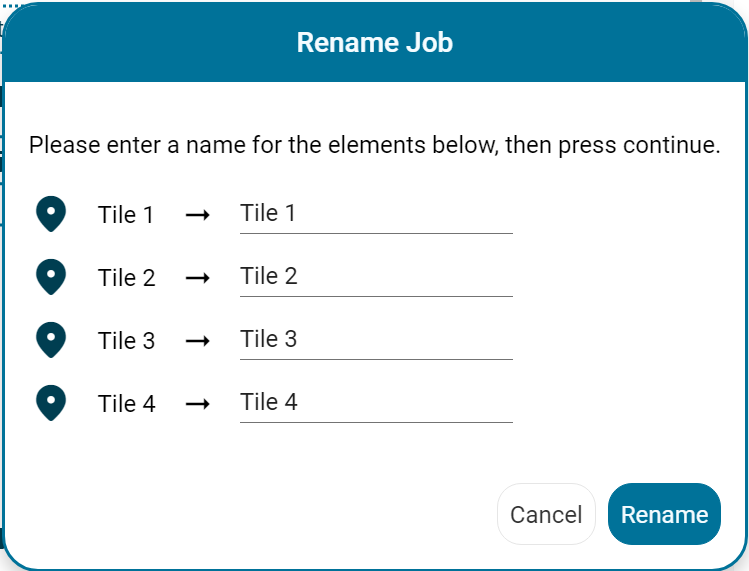
When you click "Rename Job," a dialog window (very similar to the one that opens when you rename a folder) will open. Enter the new name for the job and click 'Rename' to commit this change.
Action Panel
From the action panel, you can choose certain 'actions' to run on folders and/or jobs. These actions may be used to visualize or edit metadata (data at the job level).
Making A Selection

Before running an action, you'll have to make a selection. You can select whole folders, individual jobs, or any combination of the two. Notice for any "containers," i.e. companies and folders that contain other folders and/or jobs, there will be a solid border if that container and all its contents are selected. The border will change to a dotted border if only some of its contents are selected. Jobs will always have a solid border for when they're selected.
Anything with a solid border will be deselected (and all its contents deselected) when clicked; anything with a dotted border or no border will be selected (and all its contents selected) when clicked.
Visualizing Metadata

First in the list is the "Highlight a Master Location Directory" option in the Action Panel will color-code jobs within your selection depending on whether they've been checked into a Master Location Directory or not, as well as indicate if the job has been modified since the last time it was checked in and should be checked in again. In addition to the color-coding, an icon (same as the one seen above next to "Highlight a Master Location Directory") will be added to the right of the job name.

When you click on this action, the "Visualize Master Location Directory" dialog window will explain the color coding mechanism used to visualize the master location directory, and prompt you to select a master location directory from the dropdown. Click "Visualize" to commit this choice.
When the visualization is applied, you'll need to open any folders within the selection to view the color coding for those jobs within those folders.
*Visualizations will disappear if you refresh the page (they do not save across sessions).

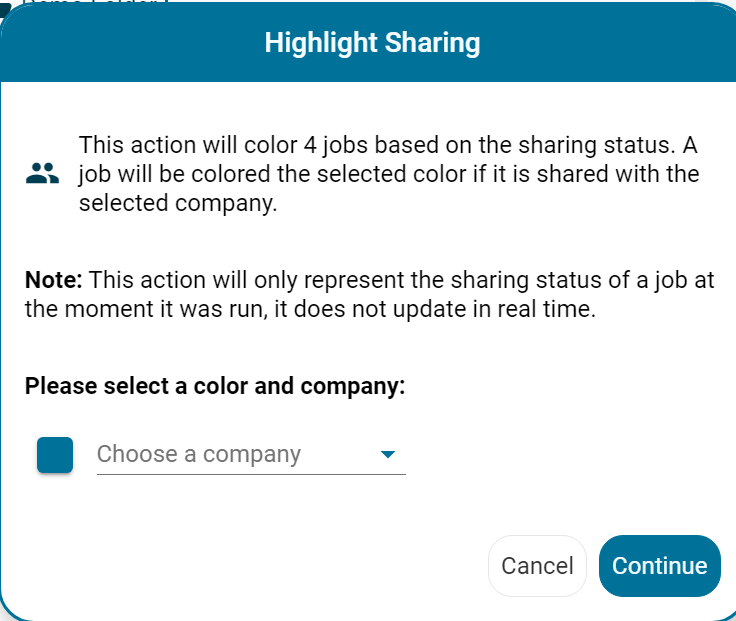
The "Highlight Sharing" action is similar to the "Highlight a Master Location Directory," only it will add highlights to jobs that are shared with the specified company, along with the icon shown above next to "Highlight Sharing."

When the "Highlight Sharing" option is clicked after making your selection, click on the color square to choose a color from the opened color chooser and then choose a company from the "Choose a company" dropdown. Click "Continue" to commit these selections and render the Sharing visualization.
*Visualizations will disappear if you refresh the page (they do not save across sessions).
Multiple Visualizations
When there are multiple visualizations applied to selected jobs, the first visualization applied to that job will highlight the whole job name. Any consequential visualizations applied will show up like "tags" appended to the initial highlight with the appropriate color (according to that action's color-coding) and icon (according to which action was taken).

For example, these four jobs have been shared with the same company and all have been modified since the last time they were checked into their relative master location directories.
If you don't remember which color was used for which company with the sharing highlights or which master location directory was chosen for any applied master location directory highlights, you can hover on the specific highlight for more information.

In the above example, there are two sharing highlights applied to the job "Tile 3" (and one master location directory highlight). By hovering over the first icon that's a part of the orange highlight, a tooltip displays that this highlight is for visualizing the job's sharing details, and that this job has been shared with the company "Katapult."

Unlike sharing highlights, master location directory highlights are color-coded based on their status in the master location directory (MLD). If you have multiple MLD highlights, you can hover on the specific MLD highlight to see which MLD that MLD highlight corresponds with.

The "Clear Highlights" action will clear all highlights applied by a visualization action from jobs within the selection. (If you want to clear all highlights from the entire Folder Viewer, you can also refresh the page.)
Editing Metadata
When you use any action that edits job metadata, please proceed with caution. Any changes made through these actions cannot be easily undone.

Using this action from the Action Panel will allow you to create, overwrite, update, or remove attributes at the job level for the selection. You can only edit the job metadata of jobs with the same model. If your selection has jobs with different job models, you will be prompted to choose a job model to edit metadata of all the jobs within the selection with the specific job model you have chosen.

The "Edit Metadata" dialog window will show you, after the "Job Model," which job model is shared by all affected jobs, and how many jobs in the selection have that job model will be affected by the changes you make.
The table will allow you to edit multiple job attributes at once. Choose the job attribute you want to modify in the first dropdown. Then choose whether you want to add this attribute to the job if it doesn't already exist ("Create"), add the attribute if it doesn't already exist or overwrite the attribute if it already does exist ("Overwrite"), overwrite the attribute if it already exist but do not add it if it doesn't ("Update"), or remove the attribute entirely ("Remove").

This Rename Job action from the Action Panel will allow you to rename all the job(s) in the selection.

This "Rename Job" dialog window will appear, showing the names of all job(s) in your selection. The text field at the right of each job is where you will input the new name of the job. Click "Rename" to commit these changes.

The Remove from Master Location Directory action will allow you to remove all jobs in the selection from a Master Location Directory (MLD) (of your choosing from the provided dropdown). Note that, when you go to check the Master Location Directory settings for the jobs in the selection, the "Last Checked In" will show "Never" for whichever MLD you have removed the jobs from.

The "Open Job" option from the Action Panel will open the selected job or open the first job in the selection.
Limitations
You cannot run more than one bulk action from the Action Panel at a time
Your selection disappears after running an action on it (even if you choose to cancel that action)
"Highlight Sharing" does not detail which level of access a company has to job(s); it simply shows which job(s) that company has access to
Visualizations applied to jobs cannot be saved (they will disappear if you refresh the page)
When using "Clear Highlights," you cannot clear one type of highlight applied to the selection; all highlights on the selection will be cleared
Thanks for reading! If you have any questions, reach out to us at support@katapultengineering.com or 717.430.0910. How can we improve our documentation? Let us know in the comments below!
%20small.png)
Comments